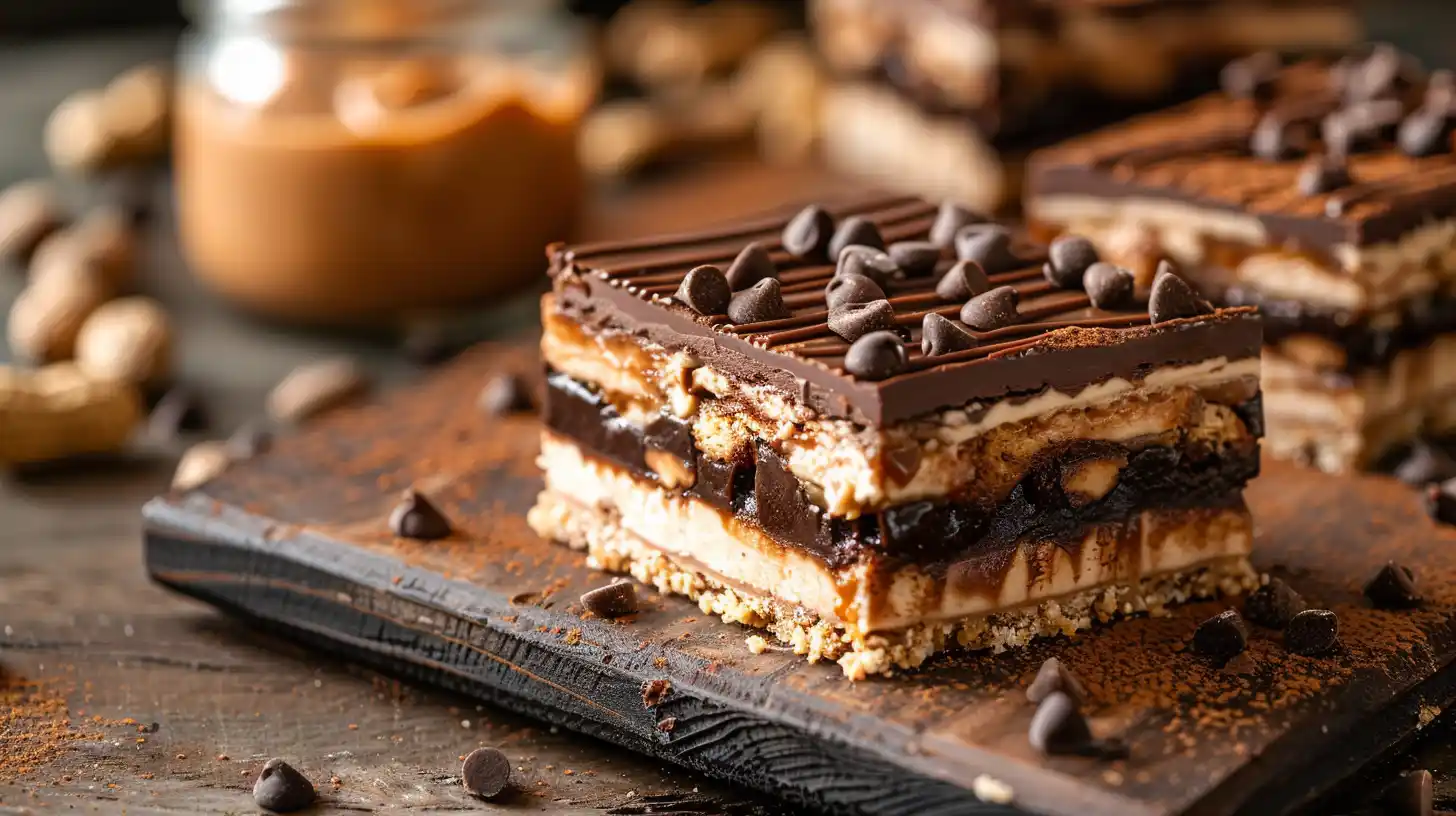
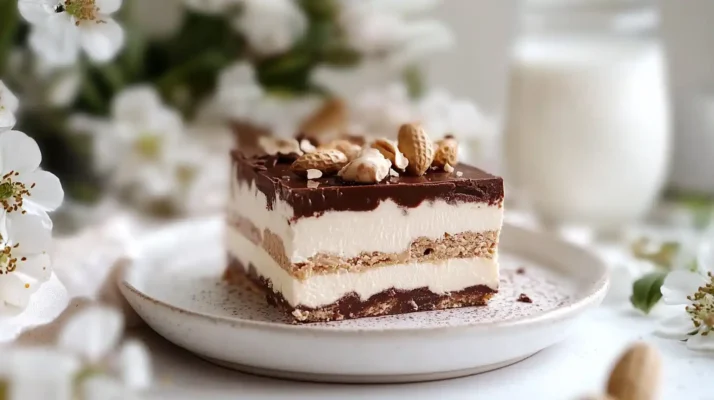
Imagine biting into a bar that perfectly balances creamy peanut butter, rich Chocolate, and a crunchy base. That’s the magic of Peanut Butter Dream Bars—the ultimate treat for peanut butter lovers, offering a mix of sweet, salty, and crunchy in every bite. Ideal for family gatherings, parties, gatherings, or simply giving yourself a treat!
The best part? They’re super easy to make with simple pantry ingredients. Whether you prefer them baked or no-bake, with classic Chocolate or fun mix-ins like pretzels or coconut, there’s a version for everyone.
Table of Contents
What Are Peanut Butter Dream Bars?
Peanut Butter Dream Bars are rich, layered dessert bars that combine a buttery crust, a luscious peanut butter filling, and a decadent chocolate topping. Think of them as the dessert equivalent of a peanut butter cup—but in bar form, with more texture and flavor layers.
These bars often feature three key layers:
- The Crust: Typically made from crushed graham crackers, cookies, or oats mixed with butter and Sugar for a crunchy, flavorful base.
- The Peanut Butter Filling: A creamy, sweet layer made with peanut butter, powdered Sugar, and sometimes cream cheese or butter for extra richness.
- The Chocolate Topping: A smooth layer of melted Chocolate, often with a touch of peanut butter mixed in for an extra creamy finish.
Originating from the world of no-bake desserts, Peanut Butter Dream Bars have evolved into countless variations. Whether you prefer them soft and fudgy or with a firm, cookie-like base, these bars are versatile and endlessly customizable.
Key Ingredients for Peanut Butter Dream Bars
The magic of Peanut Butter Dream Bars is in their simplicity. With just a few pantry staples, you can create a rich, creamy, and delicious dessert.
Peanut Butter – The Star Ingredient
The peanut butter type you select is important:
- Creamy Peanut Butter: Smooth and velvety—perfect for a classic texture (brands like Jif or Skippy).
- Crunchy Peanut Butter: Adds a nice crunch if you prefer extra texture.
- Natural Peanut Butter: Healthier but oilier—stir well and adjust Sugar to balance.
Pro Tip: Avoid peanut butter spreads with added oils or sweeteners—they can affect texture.
Sweeteners – Balancing the Flavor
To complement the nutty flavor:
- Powdered Sugar Creates a smooth, creamy filling.
- Brown Sugar: It adds an underlying caramel-like sweetness.
- Honey or Maple Syrup: Great for natural sweetness, especially in no-bake bars.
Pro Tip: If using liquid sweeteners, reduce other liquids to maintain consistency.
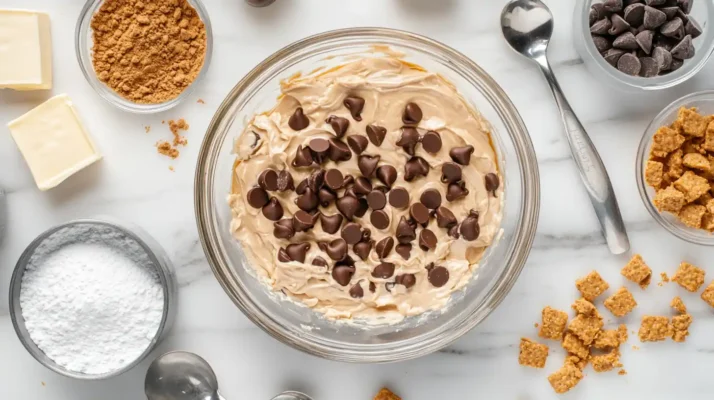
Chocolate & Add-Ins
A rich chocolate layer completes the bars:
- Semi-Sweet Chocolate Chips: A balanced, classic choice.
- Dark Chocolate: Offers a bolder, slightly bitter contrast.
- Milk Chocolate: Sweeter and creamier for those who prefer a milder flavor.
Optional add-ins:
- Chopped Nuts: Almonds, pecans, or peanuts for crunch.
- Shredded Coconut: Adds a tropical touch.
- Mini Marshmallows: For a gooey, fun texture.
How to Make Peanut Butter Dream Bars
Ready to create your Peanut Butter Dream Bars? This recipe is super easy—perfect for beginners or seasoned bakers. You only need a mixing bowl, spatula, and baking dish (or skip the oven for a no-bake version!).
Ingredients
- For the Crust:2 cups crushed graham crackers
- ½ cup melted unsalted butter
- ¼ cup granulated sugar
- To make the Peanut Butter Layer :1 cup creamy peanut butter
- ½ cup softened unsalted butter
- 1 ½ cups powdered sugar
- 1 tsp vanilla extract
- For the Chocolate Topping: 1 half cup semi-sweet chocolate chip
- ¼ cup peanut butter (optional for creaminess)
Step-by-Step Instructions
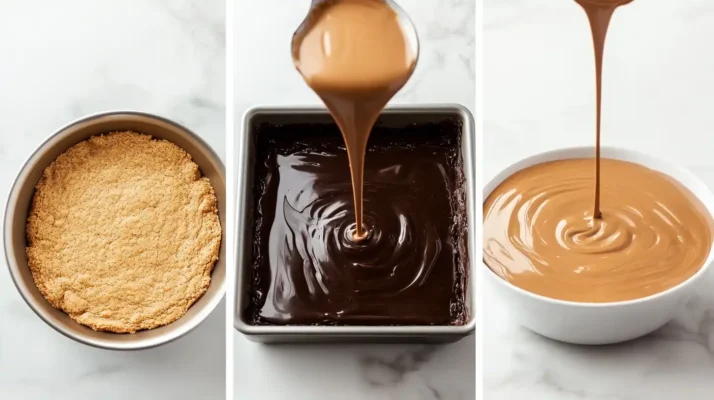
1. Make the Crust
- Crush: Pulse graham crackers in a food processor or crush them in a ziplock bag.
- Mix: Combine crumbs with melted butter and sugar until it looks like wet sand.
- Press: Line an 8×8-inch pan with parchment paper and press the crust evenly.
- Optional: Bake at 350°F (175°C) for 8–10 mins or chill for a no-bake option.
2. Prepare the Peanut Butter Layer
- Mix: Beat peanut butter and butter until smooth.
- Add: Gradually mix in powdered Sugar and vanilla.
- Spread: Pour over the crust and smooth it out.
- Tip: If too thick, add 1 tbsp of milk.
3. Add the Chocolate Topping
- Melt: Combine chocolate chips and peanut butter (optional) in the microwave (30-second intervals) or a double boiler.
- Spread: Pour over the peanut butter layer and smooth evenly.
- Chill: Cool for a minimum of two hours or until it is set..
4. Slice & Serve
- Lift: Use parchment paper to lift the bars from the pan.
- Slice: Cut into squares or rectangles.
- Enjoy: Serve chilled or at room temperature—delicious either way!
Baking Tips for Perfect Peanut Butter Bars
Making Peanut Butter Dream Bars is foolproof, but a few tips can take them from good to great.
1. Use Room Temperature Ingredients
Bringing your butter and peanut butter to room temperature helps them mix more smoothly, creating a creamier texture without lumps.
2. Don’t Overheat the Chocolate
When melting Chocolate, heat it gently to avoid burning. Burnt Chocolate can become grainy and lose its silky texture.
3. Chill Thoroughly Before Slicing
Patience is key! Chilling the bars ensures the layers are correctly set, making them easier to cut into neat squares.
4. For Clean Cuts
Dip your knife in hot water, dry it, and then slice. This helps achieve clean, sharp edges without cracking the chocolate layer.
5. Adjust Sweetness to Taste
If you prefer a less sweet bar, reduce the powdered Sugar slightly. You can also use dark Chocolate for a more decadent, less sweet topping.
No-Bake Peanut Butter Dream Bars Option
If you’re short on time or don’t feel like turning on the oven, you’ll love this no-bake version of Peanut Butter Dream Bars. It’s just as delicious as the baked version, with a slightly softer, creamier texture. Plus, it’s perfect for hot days when you want a sweet treat without the heat.
Ingredients You’ll Need (No-Bake Version):
- For the Crust: 2 cups of graham crackers that have been crushed or digestive biscuits
- ½ cup of melted unsalted butter
- ¼ cup of brown Sugar (optional for extra sweetness)
- To make the Peanut Butter Layer: 1 cup of smooth peanut butter
- ½ cup of unsalted butter (melted)
- 2 cups of powdered Sugar
- 1 teaspoon of vanilla extract
- For the Chocolate Topping:1 half cup of chocolate chip semisweet
- ¼ cup of peanut butter (for extra creaminess)
Step-by-Step Instructions (No-Bake Method)
1. Make the Crust
- Make the Crust Ingredients: in a bowl large enough, mix the crushed Graham crackers with the butter that has been melted and brown sugar. Stir until everything is well combined.
- Press the Pan: Line an 8×8-inch baking pan with parchment paper. The mixture should be firmly pressed into the pan’s bottom to create an uniform layer. Please place it in the fridge to set while you prepare the filling.
2. Prepare the Peanut Butter Layer
- Mix the Filling: In a separate bowl, stir together the peanut butter, melted butter, powdered Sugar, and vanilla extract until smooth and creamy.
- Spread over the Crust Spread the mixture over the crust that has been chilled and smooth it out with the spatula.
3. Add the Chocolate Topping
- Melt the Chocolate: in a microwave-safe bowl melt chocolate chips along with the peanut butter at 30 second intervals, stirring until the mixture is smooth.
- Pour and Spread: Pour the chocolate mixture on top of the peanut butter, and spread it out evenly.
4. Chill and Serve
- Refrigerate the bars: Place them in the refrigerator for at least two hours or until they are firm.
- Slice and enjoy: Make use of the sharp edge of a knife the squares once the cake has fully set.
Pro Tip: For an extra glossy finish, sprinkle a pinch of sea salt on top before the chocolate sets!
Variations to Try
Peanut Butter Dream Bars are easy to customize. Here are some fun variations:
1. Vegan Peanut Butter Dream Bars
- Butter Substitute: Use coconut oil or vegan butter.
- Chocolate: Choose dairy-free dark Chocolate.
- Sweetener: Maple syrup or agave for a natural touch.
2. Gluten-Free Version
- Crust: Make use of gluten-free graham crackers as well as almond flour.
- Oats: Gluten-free rolled oats for a chewy base.
3. Low-sugar/Keto Bars
- Sweetener: Use erythritol or monk fruit.
- Chocolate: Sugar-free dark Chocolate.
- Nut Butter: Almond or sunflower seed butter.
4. Fun Add-Ins
- Chopped Pretzels: Salty crunch.
- Mini Marshmallows: Gooey texture.
- Shredded Coconut: Tropical flair.
Storage Tips
Keep your bars fresh with these tips:
1. Room Temperature
- Place in an airtight storage container for up to two days.
- Avoid direct sunlight.
2. Refrigeration
- Keeps fresh for up to 1 week.
- Layer with parchment if stacking.
3. Freezing
- Wrap each wrap individually and place in an airtight bag.
- Lasts up to 3 months.
- Pro Tip: Frozen bars taste like candy bars!
Health Benefits
While indulgent, they offer some nutritional perks:
1. Protein Power
- 7–8g of protein per serving.
- Healthy fats support heart health.
2. Energy Boost
- Carbs + healthy fats = sustained energy.
- Great pre/post-workout snack.
3. Fiber & Nutrients
- Add oats or flaxseeds for fiber.
- Rich in Vitamin E, magnesium, and potassium.
Common Mistakes to Avoid
1. Wrong Peanut Butter
- Fix: Stir natural PB well; classic creamy PB works best.
2. Overheating Chocolate
- Fix: Microwave in 30-second bursts, stirring often.
3. Not Chilling Long Enough
- Fix: Chill for at least 2 hours before slicing.
4. Too Much Butter
- Fix: Stick to recipe amounts to avoid greasy crusts.
5. Skipping Parchment Paper
- Fix: Always line the pan for easy removal.
Frequently Asked Questions (FAQs):
1. Can I Use Almond Butter Instead of Peanut Butter?
Yes! Almond, cashew, or sunflower seed butter works well. Expect a slight flavor change, and adjust the powdered Sugar if the texture is too oily.
2. How Do I Make These Bars Less Sweet?
- Reduce powdered Sugar.
- Use dark Chocolate instead of milk chocolate.
- Sprinkle a little sea salt to make the sweeter.
3. Can I Make Them Without Chocolate?
Yes! Try:
- Caramel drizzle, White Chocolate, or peanut butter glaze.
- Nuts or coconut flakes for extra texture.
4. Why Are My Bars Falling Apart?
- They may need more chilling time.
- The crust might not be firm enough—press it tightly.
- Dip your knife in hot water, wipe dry, and slice for clean cuts.
5. How Long Do They Last?
- In the Fridge: For up to a month (airtight containers).
- In the Freezer: up three months (thaw just before serving).
6. Are They Gluten-Free?
Not the classic version, but you can:
- Use gluten-free graham crackers.
- Replace oats with certified gluten-free oats.
Conclusion
Peanut Butter Dream Bars are the ultimate treat for anyone who loves peanut butter’s rich, creamy flavor combined with Chocolate’s indulgence. Whether you prefer them baked, no-bake, vegan, gluten-free, or with fun add-ins, there’s a version of these bars to satisfy every craving. They’re incredibly easy to make, requiring simple pantry staples, and perfect for any occasion—a casual family gathering, a holiday party, or just a well-deserved treat for yourself. With their perfect balance of sweet, salty, creamy, and crunchy, these bars truly live up to their name—a dream come true for dessert lovers everywhere.
So, what are you waiting for? Gather your ingredients, follow the steps, and indulge in the deliciousness of homemade Peanut Butter Dream Bars. Trust me, once you try them, they’ll become a regular favorite in your recipe collection!